Well, maybe not lost, but not as common as it once was. As a kid, in our house late summer always meant canning time. Mom canned peaches, pears, plums (which were thereafter referred to as turtles) and probably others that I'm forgetting.
This cooker hasn't seen very much use in recent years.
Time to dust it off . . .
Time to dust it off . . .
grab a few of these . . .
(Seven for a full cooker. Sterilize.)
and a handful of these.
(The rings are reusable. The lids are not, they should be new.)
The basic tools needed for canning.
Only three ingredients will be going inside the jars: Fruit, water, sugar.
We did peaches.
Tip: Get your fruit a few days before you plan to can so it has a chance to ripen.
Tip: When buying peaches make sure you get a freestone variety.
It's a little hard to do a step-by-step explanation because we had more than one person doing things (Ok, I admit it, I was more concerned with taking pictures than helping) but here's my suggested sequence:
Fill cooker approximately half way with hot water. Place it over high heat with the lid on and bring it to a boil.
Tip: don't put the wire rack in until you're ready to put the jars in.
Put the lids in boiling water to sterilize. It's not necessary to boil the rings.
Place 4 & 1/3 cup sugar (2/3 cup per jar) in pan and cover with water. Heat just until sugar dissolves.
Time to fill the jars.
You may need to do a little sorting, picking out the ripe ones and saving the others for another day.
Wash them well. No need to peel as the peelings slip right off after they've been canned.
Cut in half and remove the pit (this is where the freestone comes in handy.)
Place each half in the jar, pit side down. (Not sure if there's a reason for placing them that direction, it's just the way we've always done it.)
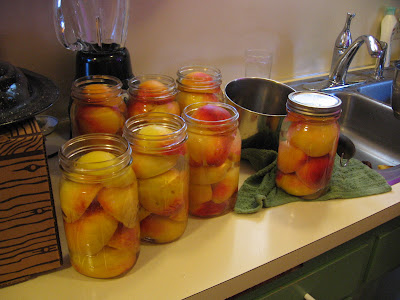
Fill right to the top. Aren't they pretty?
Jars of summer sunshine.
Ready to add a little sweetness.
Take the syrup and distribute it evenly between the seven jars. It won't fill them.
Add more plain water to each jar until the liquid is about half an inch from the rim, right about where that lowest ridge is.
Place a lid and then a ring on each jar and tighten.
Remember that cooker of hot water? It should be boiling by now. If not, wait until it is.
Then . . .
Put the wire rack in the cooker, resting the notches on the rim (sorry, no picture). Place the jars carefully in each space and then lower them into the water. Cover with lid and wait. And wait, and wait.
It always amazes me how long it takes to bring it back to a boil.
Once it is boiling again, let it boil for about eighteen minutes. Then, using the handles on the wire rack, remove the jars and place on a protected surface, away from any cool breezes (so the jars won't crack from a sudden temperature change).
Success? Well, you know the saying - the proof is in the pudding? (what does that mean, anyway?).
In this case, the proof is in the pop!
That sound you hear when the lid is sucked down and seals the jar. It happens at some point in the cooling process
If you miss it, you can test the seal by tapping on the lid. It should be a nice, clear ping as opposed to a dull thud of an unsealed jar.
I hope you'll give this a try. It's really quite easy.


YUM those look good!
ReplyDeleteWe haven't tried this batch yet, but they usually are wonderful - no comparison to store-bought!
DeleteThank you for your pictoral! We tried canning for the 1st time this year...corn relish.
ReplyDeleteDiannia
Thanks for stopping by! I'm sure you'll enjoy the "fruits" of your labor.
Delete