Monday, September 17, 2012

A Crafter's Retreat- By Sarah

My mother asked me to guest blog for a little something different.  When I first sat down, I had the same amount of writer's block that she invariable has when trying to write.  I pointed out the irony of this, and we both laughed extensively, which has been a key trait of my visit.

The reason for my visit is because of the extensive renovations that are being done on my recently purchased house.  These renovations were getting to be a little overwhelming, as Jared and I are living in the house, and it had been awhile since visiting out here, so I thought, why not visit Washington?  Of course I also had a few things I wanted to accomplish while out here.  I recently decided that I needed to make a quilt for my bed, and feeling fairly confident that my skill level was beyond a nine-patch, I researched a pattern that I really liked.  As fate would have it, I fell in love with the Mariner's Compass pattern.  With no previous experience, mom and I embarked on an interesting journey to create a beautiful work of art.

First, we had to figure out how to do paper piecing. Mom knew of the theory behind it, but never actually did any before this.  After drawing my design on several pieces of freezer paper, I transferred the lines to a fusible paper that would get torn away later.


Picking out fabrics is always fun, and I chose some good ones.  I decided to make the spokes of the compass two toned to give it some dimension, so I needed to get a light and dark color for each point.  The yellow will be used for a center circle.


For those who are skeptical of Eb's existence, I can say, he really is real.  BELIEVE me, he made sure I paid attention to him.


"I'm just trying to help you sew!"
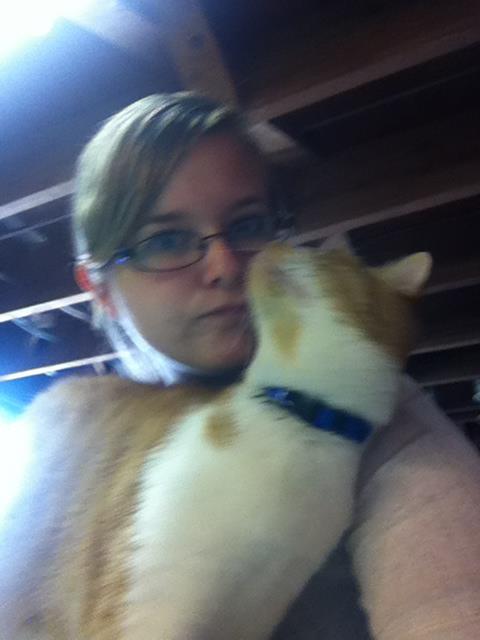


"Am I helping yet?"


Flo pretty much ignored me, but made sure my fabrics got worn in.


Anyway, while the cats tried to distract me, I was busy putting my rectangular pieces of fabric on my compass that was separated into eighths.  Once we figured out how to sew the pieces together, the process went fairly quickly.  The eighths became quarters, quarters became halves, and the halves were assembled to finally have a giant medallion.


Pretty isn't it!?  I was really quite pleased with how amazing and complex it looks, even though it's quite straightforward.


The next part was putting the center on to cover up the raw edges in the middle.  Though she tried to get me started with the hand sewing, I found I was all thumbs when it came to this part.  Luckily, mom didn't object too much to doing it for me, but insisted I do something for her.  So here I am, blogging for her as punishment for being unable to sew with the smallest needle on earth.  I can't complain too much, considering how much she's helped me on this project.  My goal is to have the top almost completely done before I fly home on Wednesday morning.  We'll see how it goes.  I certainly hope it doesn't become a UFO.

The next step for my quilt will be to assemble the medallion to the background, add borders and then put the sandwich together.  I am really quite pleased with how it looks, and it's very encouraging to accomplish something in such a short amount of time.  To see the chaotic adventure that is my house, visit my blog at http://thegeorgiajardin.blogspot.com/ .  Hopefully once things with the house settle down, I'll have my own space to do my own crafting/quilting/sewing...stuff.  It's been fun, Washington!

Sarah

(Ok, we're even- Mom.)

Tuesday, September 11, 2012

Preserving a Lost Art

I could also say Preserving: A Lost Art.

Well, maybe not lost, but not as common as it once was.  As a kid, in our house late summer always meant canning time.  Mom canned peaches, pears, plums (which were thereafter referred to as turtles) and probably others that I'm forgetting.


This cooker hasn't seen very much use in recent years.


Time to dust it off . . .


grab a few of these . . .
(Seven for a full cooker.  Sterilize.)


and a handful of these.
(The rings are reusable.  The lids are not, they should be new.)


The basic tools needed for canning.


Only three ingredients will be going inside the jars:  Fruit, water, sugar.

We did peaches.  
Tip:  Get your fruit a few days before you plan to can so it has a chance to ripen.
Tip:  When buying peaches make sure you get a freestone variety.


It's a little hard to do a step-by-step explanation because we had more than one person doing things (Ok, I admit it, I was more concerned with taking pictures than helping) but here's my suggested sequence:


Fill cooker approximately half way with hot water.  Place it over high heat with the lid on and bring it to a boil.
Tip:  don't put the wire rack in until you're ready to put the jars in.


Put the lids in boiling water to sterilize.  It's not necessary to boil the rings.


Place 4 & 1/3 cup sugar (2/3 cup per jar) in pan and cover with water.  Heat just until sugar dissolves.


Time to fill the jars.  
You may need to do a little sorting,  picking out the ripe ones and saving the others for another day.


Wash them well.  No need to peel as the peelings slip right off after they've been canned.
Cut in half and remove the pit (this is where the freestone comes in handy.)


Place each half in the jar, pit side down.  (Not sure if there's a reason for placing them that direction, it's just the way we've always done it.)


Fill right to the top.   Aren't they pretty?


Jars of summer sunshine.


Ready to add a little sweetness.


Take the syrup and distribute it evenly between the seven jars.  It won't fill them.  
Add more plain water to each jar until the liquid is about half an inch from the rim, right about where that lowest ridge is.


Place a lid and then a ring on each jar and tighten.

Remember that cooker of hot water?  It should be boiling by now.  If not, wait until it is.
Then . . .
Put the wire rack in the cooker, resting the notches on the rim (sorry, no picture).  Place the jars carefully in each space and then lower them into the water.    Cover with lid and wait. And wait, and wait.


It always amazes me how long it takes to bring it back to a boil.  

Once it is boiling again, let it boil for about eighteen minutes.  Then, using the handles on the wire rack, remove the jars and place on a protected surface, away from any cool breezes (so the jars won't crack from a sudden temperature change).


Success?  Well, you know the saying - the proof is in the pudding? (what does that mean, anyway?).  

 In this case, the proof is in the pop!


That sound you hear when the lid is sucked down and seals the jar.  It happens at some point in the cooling process

If you miss it,  you can test the seal by tapping on the lid.  It should be a nice, clear ping as opposed to a dull thud of an unsealed jar.

I hope you'll give this a try.  It's really quite easy.   

Monday, September 3, 2012

Cue Tips

Trying to come up with a clever post title is sometimes quite a mind journey for me.  This trip started with a "just the facts ma'am" title:  Tips.  Along the way, I visited the old favorite of strikethroughs:  Tip of the Day, Week, Month . . .  When I got to Quilting Tips it was still too boring for my taste.  Then it hit me.  How about a play on those famous cotton swabs known as . . .  I went to their website.  They make it very clear that they don't want you to use the name inappropriately.   Fine.  No problem.

I like this title even better.

And I really do have a quilting tip to share.